Sunday, April 3, 2016
Grown Up Bathroom Phase 2 - How to Build Pipe Shelves
While Eaphis and the boys were having some good father-son time at the 76er's game yesterday, I decided to tackle an easy project in the master bathroom and put up the over the toilet shelves in our master bathroom. I had been collecting stuff to fill up these bad boys for a few weeks so I've been patiently waiting to put it all together.
I usually don't write up step-by-step blogs but I've gotten a few questions from people about the pipe shelves that I built in the boys bathroom so thought what the heck, let's change it up a bit. So following is a semi-detailed description of how to go about making your own pipe shelves - I started these yesterday afternoon and finished hanging them this morning so this really is a super quick project.
I like to draw up little sketches before I start so I have an idea of what I'll eventually be putting on the shelves and can make sure they're wide enough to hold everything. In this instance, the widest thing I had was the toilet paper holder which juuuusssttttt fit on the wood I found in the construction site which was one long 2x9 board, perfect for some nice chunky shelves.
Because this wood was so thick, I used my table saw to cut it down into 4 - 30" boards and then set up outside to start staining. (Adding a note from a smart friend who is adept at home improvement: Be careful cross cutting wood, particularly thick dimensional lumber, on a table saw. There's a big potential of nasty kickback. Much safer to use a hand held circular saw or a miter saw.)
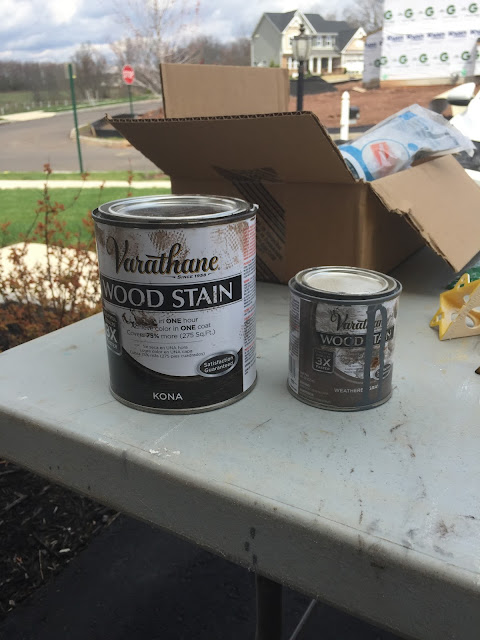
For this project I used the same process I used on my dining room table to get a nice dark and weathered look, which involves doing one coat of dark wood stain, then sanding to distress, and following up with a coat of gray stain. If you're just planning on a solid color I would suggest sanding beforehand to get rid of any rough edges.
Once I'm done staining I go over with one coat of polyurethane. This is my favorite kind to use because it dries very fast, doesn't leave a shiny coat, and can be cleaned up with water.
While these were drying I ran out to Home Depot to pick up the pipe pieces. For each shelf you will need two straight pieces that are long enough to hold your boards, two flanges, and two end caps. There are a few sizes to choose from, but I like the 3/4" size because it holds up good with the chunkier look.
At home, I assembled them together and than painted with Hammered Silver spray paint (after they dry I take them apart so I can install the flanges separately). You can use any color you'd like (I used black in the boys bathroom) but the Hammered finish works great and gives you that worn in look.
Once dry enough to handle, I started hanging them. I measure in the same distance from each side and then use my level to mark out the line for the top row of screws.
When I don't have studs to drill into I like to use self-drilling anchors. I find that they hold up really well, especially with heavy things, and if you need to take them out for any reason they are much easier to remove than any other kind. To use, you pre-drill small holes in your drywall, and then use a screwdriver to drill in the anchors. Once those are all in you can hang your flanges; make sure your screw-heads are large enough that they don't slip through the flange holes.
Once your flanges are up you can re-attach the pipes. I check to make sure these are level before I put my shelves in so I can adjust accordingly, and then check again to be extra sure.
After I get the first one in, I measure out the distance to the ceiling and then divide by how many remaining shelves I have.
Lather, rinse, repeat - and you're done! Then comes the fun part - decorating...............
I'm super happy with how these babies turned out - good luck if you decide to tackle your own set....I think you'll also be super happy if you do!
Subscribe to:
Posts (Atom)
PLEASE NOTE: This site contains affiliate links to some of my favorite places to shop....all views and opinions are my own.
-
Since I'm not tackling as many big projects this year, I want to spend some time sharing the smaller touches that make my house feel...
-
So my powder room has been making me angry lately...angry enough to grab my crowbar. But before I start tearing up molding (or a few hours ...


